Installing ShareAI on Windows
This guide walks you through setting up the ShareAI Windows App in just a few simple steps.
Prerequisites
Before installing ShareAI, ensure your system meets the following requirements:
- Operating System: Windows 10 or newer
- CPU: At least 8 cores (modern Intel/AMD recommended)
- RAM: Minimum 16 GB
- Disk Space: Minimum 20 GB free
Important:
Your device’s performance directly impacts how much you can contribute to the ShareAI network.
- CPU, GPU, and RAM determine how fast you can process tasks.
- GPU VRAM (memory) determines the size of AI models you can run.
For a good experience — especially if you want to load larger AI models and become a Prosumer contributor — we recommend:
- At least 12 GB of GPU VRAM to load models up to the 7B-8B size range (e.g.,
deepseek-r1:8b).
Devices with lower specs can still contribute but may handle smaller models or tasks.
ℹ️ ShareAI currently ships unsigned installers. You may encounter a Windows security prompt during installation. We are working on digital signing for future releases.
Step 1: Download the Installer
Download the latest version of the ShareAI Windows App:
Save the ShareAI.msi file to an easily accessible location on your computer.
Step 2: Launch the Installer
Once the download completes:
- Locate the
ShareAI.msifile. - Double-click the file to open it.
- If you see a security warning, click Run to proceed.
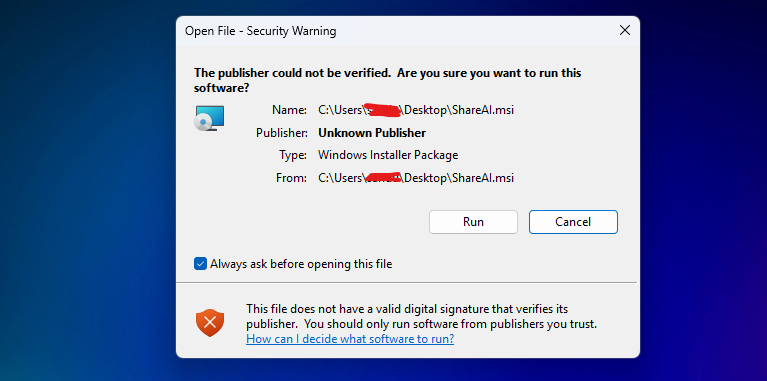
⚠️ Windows may display a warning because the installer is not digitally signed. This is expected for now.
Step 3: Install ShareAI
Follow the prompts from the ShareAI Setup Wizard:
- Click Next to continue.
- (Optional) Customize your installation location if needed.
- Click Next, then Install to begin the installation.
The process should take just a few moments.
Step 4: Finish Installation
When the installation completes:
- Click Finish to exit the installer.
- ShareAI will now be available from your Start Menu or Desktop.
What’s Next?
🎉 You’re ready to start sharing your computing power with ShareAI!
Launch the app and follow the onboarding instructions to get started.